
Mastering Power Supply and Energy Management for Your Off-Grid Tiny House: The Essential Solar Guide
Learn how to accurately assess your energy needs and design a reliable solar system that keeps your off-grid tiny home powered day and night.

Living off-grid in a tiny house is the dream for many—a life of freedom, simplicity, and connection with nature. But one challenge consistently tops the list of concerns for newcomers and veterans alike: Power Supply and Energy Management.
Without a reliable connection to the electrical grid, the lights, fridge, and even your ability to charge devices and Internet access all depend on the energy system you create. For most tiny house dwellers, that means solar power is king. Yet, setting up your solar system and managing your energy use is far from plug-and-play. It demands careful planning, ongoing attention, and a realistic mindset.
This article dives deep into how to approach your solar energy supply and master energy management in your off-grid tiny home.
Why Solar Power?
Solar power has become the favorite choice for tiny houses because it’s clean, renewable, relatively quiet, and—if properly designed—can meet most daily energy needs. It is also by now very developed and prices for components keep dropping—except for batteries, these are bloody expensive.
Solar panels capture sunlight and convert it into electricity, which is stored in batteries for use any time, day or night.
Unlike gas or diesel generators, solar panels don’t make noise or emit fumes, making them perfect for peaceful remote living. They also align well with the minimalist and eco-conscious values of many tiny house residents. And once installed and operational they have almost zero ongoing cost.
But solar power isn’t magic, and it needs thoughtful setup to work well.
Step 1: Understand Your Energy Needs—The Energy Audit
The foundation of a successful solar system is a thorough energy audit. This is where you break down every electrical device in your tiny home and estimate how much power it will consume.
Ask yourself:
What electrical appliances will you use? (Fridge, lights, fans, kitchen appliances, laptop, boiler, phone chargers, Internet (maybe Starlink) etc.)
How many hours per day will each device run?
What is the wattage of these devices? (This info is usually on the appliance label.)
An example:
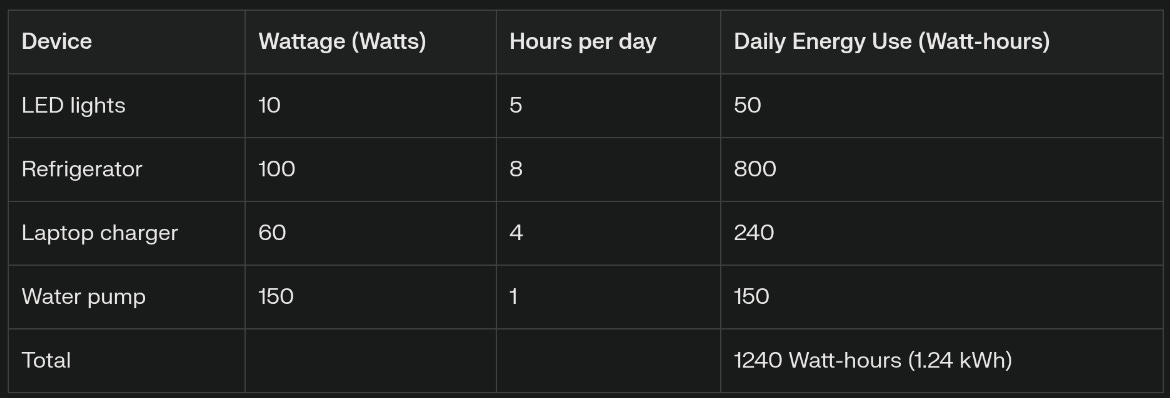
Adding it up will give you a solid estimate of your daily energy consumption. In this case, in order to operate this household, we need to design a solar system that produces 1.24kWh. I recommend to add a safety margin of between 10-20% depending on your budget and risk appetite.
I created the following video where I explain how to practically execute such an energy audit and I created an automatic spreadsheet that you can copy and use to calculate your consumption:
Step 2: Choose the Right Solar Panels
Solar panels come rated by their maximum power output in Watts (W) under perfect conditions. For example, a 300W panel produces 300 watts of power in full sunlight and the right angle.
Since sunlight hours vary by location and season, it’s important to adjust your calculations. For instance, if your location receives 5 peak sun hours per day, a 300W panel produces around:
300W × 5 hours = 1500Wh = 1.5 kWh
If your daily consumption is 1.24 kWh, one 300W panel could theoretically cover your basic needs on sunny days. But energy losses in the system (inverters, wiring, battery charging inefficiencies) mean you’ll want at least 20-30% more solar capacity to compensate.
Most tiny house solar panel setups start from 500W - 600W and are open ended, depending on lifestyle and power needs. Also, serial vs. parallel wiring of panels makes a huge difference and is critical. This is a way more technical topic and I will cover this in a later post.
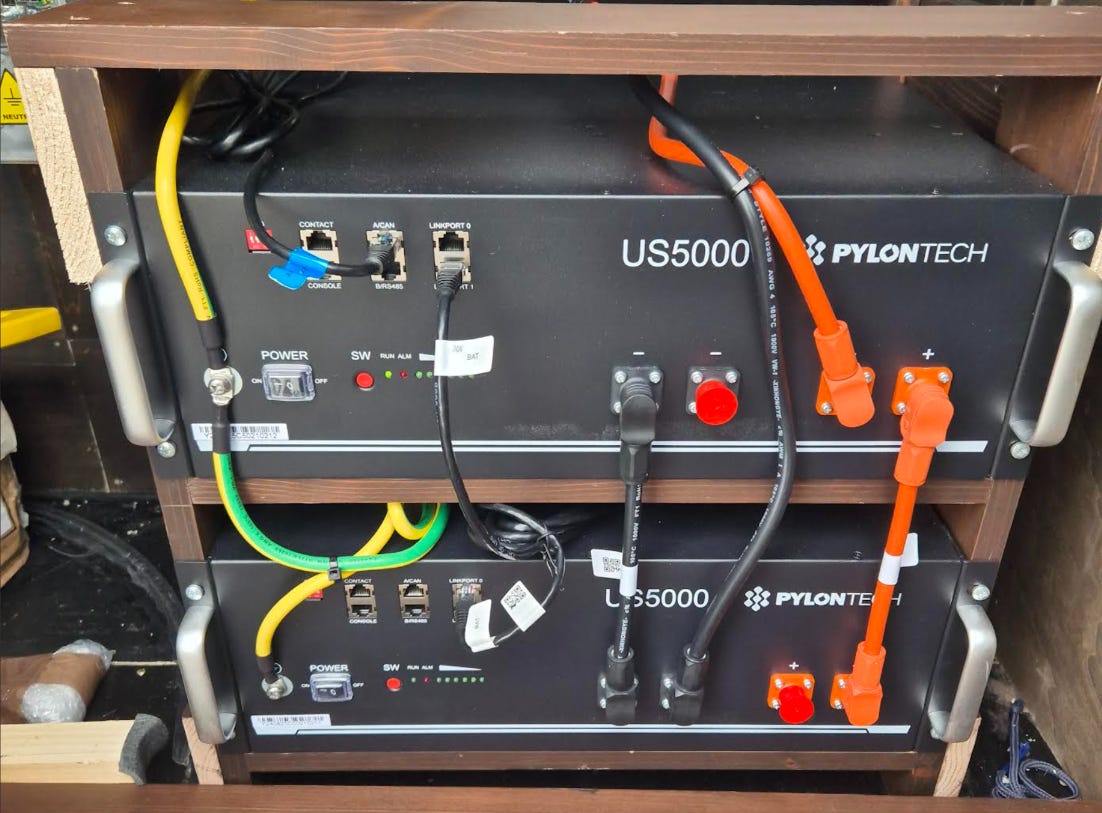
Step 3: Battery Bank—Store What You Generate
Solar generates power during the day, but you need energy at night and on cloudy days. That’s where batteries come in.
Modern off-grid tiny homes mostly use lithium-ion batteries for their higher capacity, longer lifespan, and smaller size, though lead-acid batteries remain popular for budget builds. I used lithium-ion batteries too and despite their much higher price, I can only recommend them. They offer a higher discharge depth, which means that they can safely be discharged to a higher percentage of their capacity, often up to 90%, which means more usable energy. Typically, they also have a longer lifetime, which is well worth the higher cost.
Next, you determine the battery size based on your daily consumption and how many days of autonomy you want (how many days you want to be able to consume energy without sun). For example:
Daily consumption: 1.24 kWh
Desired autonomy: 3 days
Total battery storage needed: 1.24kWh × 3 = 3.72 kWh
So, this is your value you would use to design your battery bank.
Remember, lead-acid batteries shouldn't be discharged beyond 50% to preserve life, so you’d typically double that number if using lead-acid
Step 4: The Inverter—From DC to AC
Solar panels and batteries produce and store DC (direct current) electricity, but most household appliances run on AC (alternating current). The inverter converts DC to AC.
Choose an inverter rated to handle your peak power demand (the highest power you’ll draw at once). For tiny homes, this is often 1000-3000 watts depending on appliances. But can also be a lot more than that. Again, this is totally up to your requirements and consumption scenarios.
Hybrid inverter-chargers can also manage charging from multiple sources (solar, generator, grid if available) and simplify system management. These are my favorite. It’s a fairly new type of technology, and as always has pros and cons. They are more expensive and you have only one device, which can represent your single point of failure compromising your whole setup. At the same time, the system design becomes a lot more elegant and easier to manage and maintain in your daily operations.
Step 5: System Monitoring and Energy-Efficient Habits
A big part of energy management is knowing your system’s status—how much power is being generated, stored, and consumed at any moment.
Many modern solar systems come with mobile or in-home monitors giving real-time data and alerts. Sounds great but then requires some kind of online connection like wifi, Starlink or a SIM card. So, just like almost everything in tiny living it is a decision of compromise that you’ll need to make.
And monitoring alone isn’t enough. To live comfortably off-grid, you also need to:
Switch off or unplug devices not in use.
Use energy-efficient appliances and LED lighting.
Spread out heavy-demand activities—like laundry, cooking, or charging devices—to sunny daytime hours.
Develop a rhythm around energy availability and weather forecasts.
In short, you need to learn to live a lot more energy-aware, which can mean quite a big of a change but it is also worth it.
And if shit hits the fan, see next step:
Step 6: Prepare for the Unexpected
Even the best systems face cloudy days, snow cover, and seasonal dips in sunlight. While solar gives independence, it demands backup planning, which can include:
A small, quiet generator for emergencies or low-sun periods. And make sure to have what you need to operate your generator. Your gas generator is of no use if you have no gas stored.
Extra battery capacity for longer autonomy. Spare solar panels.
Manual or propane-powered appliances to offset electricity use (propane stove, water heater).
Community or shared resources if your tiny house is in a collective or eco-village.
Step 7: Keep Observing and Improving
No one knows everything up front. This is all a big learning effect.
Your solar energy needs may change as you add or reduce appliances, change your lifestyle, or experience seasonal shifts. Keep track of your energy use, and don’t hesitate to scale your system.
Adding more panels, upgrading batteries, or installing more efficient equipment can all improve comfort and resilience.
Final Thoughts: The Mindset of Off-Grid Energy Independence
Solar power transforms the invisible miracle of electricity into something real, visible, and earned. It teaches patience, planning, and respect for natural cycles.
It is really magical.
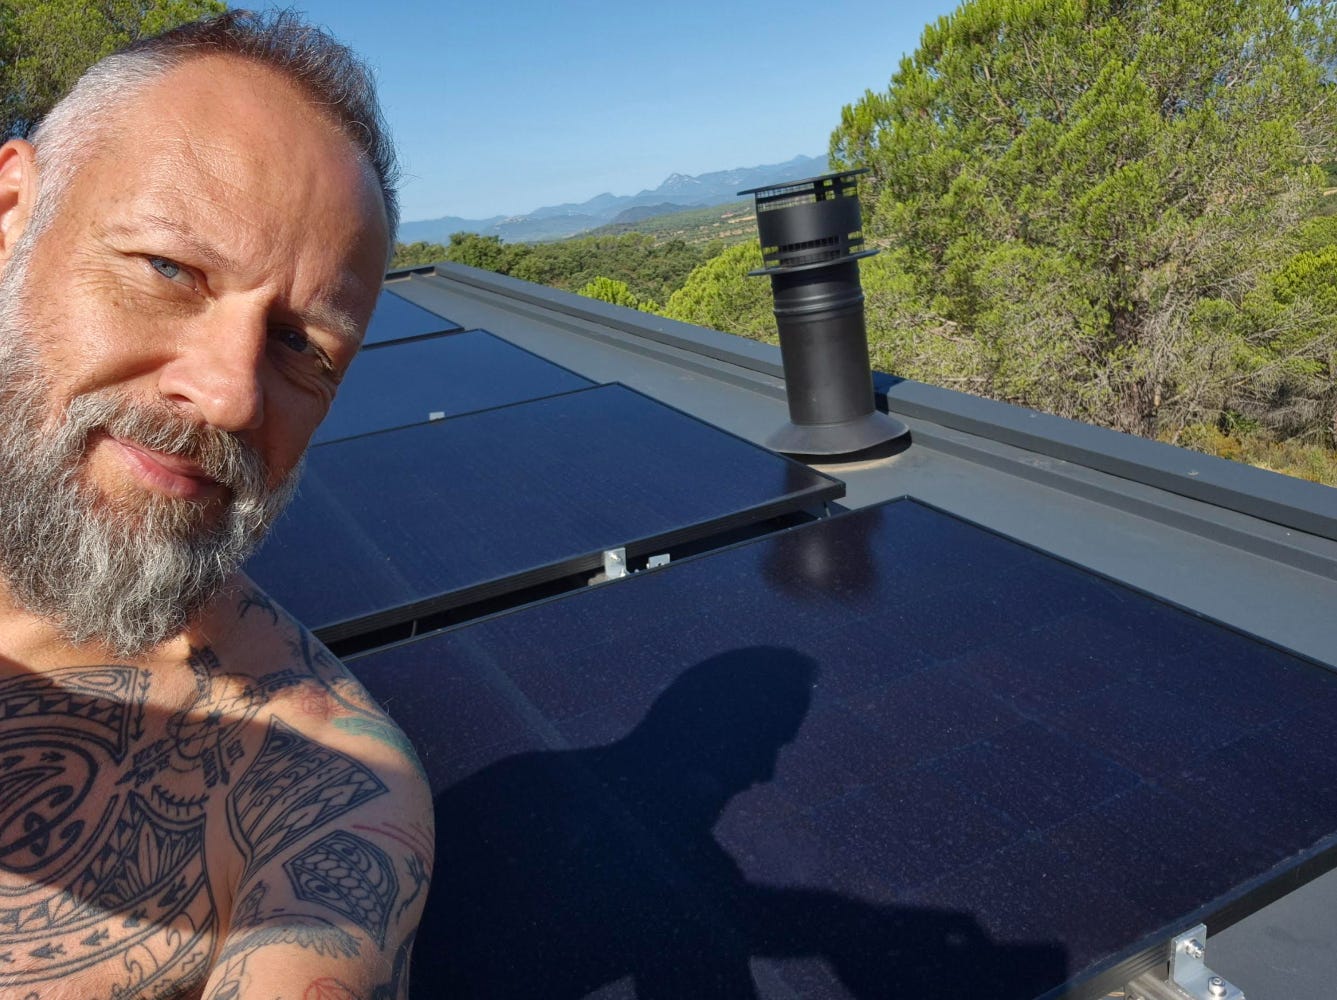
I almost started crying—well, not really—but I did feel super proud when I flipped the switch for the first time and I was able to produce my own energy for the light in my tiny house.
No system is perfect, and the first setup won’t be flawless. Expect to learn by doing, adjust habits, and sometimes troubleshoot panels or batteries. But with every watt earned from sunlight, your off-grid dream becomes closer to reality.
Remember:
Energy management in your tiny house is not about sacrificing comfort but about living smarter and more deliberately—balancing needs with what nature offers.
This was my second part of my series about the "7 Biggest Off-Grid Tiny House Challenges You Need to Know Before Making the Leap”.
If you found this helpful, subscribe for upcoming deep-dives on water systems, heating, storage, and more to thrive in your off-grid tiny home!
Would you like me to go into any aspects in more detail, or help with energy audit?
Or just leave a ❤️
No harm at all to also consider materials aka 'concrete' blocks that simply catch heat and slow release in night time. Think greenhouse effect on a block of concrete or slow release material. Does work. Low-tech.