
How to Stay Cool in a Tiny House or Van in a Heatwave
Practical, low-waste cooling strategies for tiny houses and vans, including passive cooling, portable ACs, and a simple DIY air conditioner that fits the minimalist outdoor lifestyle.

When the temperature climbs, tiny houses and vans can turn into heat traps fast. Their small size, often lots of metal surfaces, and roof-mounted solar panels make summer cooling a real challenge, but a few smart strategies can make a huge difference.
In a space this compact, the goal is not to fight physics with brute force. It is to reduce heat gain, move air well, and use energy only where it actually helps.
Why small spaces heat up
Tiny houses and vans warm up quickly because they absorb heat from several directions at once. Metal bodies and roofs conduct heat efficiently, while windows and roof openings can let in a lot of solar gain if they are not shaded or insulated well. Solar panels can also reduce the usefulness of roof shade strategies, because the roof is already occupied by equipment that brings its own thermal load. And, obviously, if we have solar panels on the roof, we cannot place the tiny house under some trees in the shade.
That is why passive cooling matters so much in these setups. The most effective measures are usually simple ones: shading, insulation, reflective surfaces, and cross-ventilation. In other words, the best cooling often starts before you ever turn on a fan.
First-line cooling tactics
A good heat strategy begins with blocking sun and letting heat escape. Park or orient your van so the largest sun-facing surfaces are minimized, use reflective window covers, and ventilate early in the morning before the interior heats up. In a tiny house, adding roof insulation, window shades, and light-colored exterior surfaces can substantially reduce heat gain.
Fans are still useful, especially when they help exhaust hot air or create a cross-breeze. A fan does not lower the air temperature by itself, but it improves comfort by moving air across the skin and helping evaporation do its job. For a minimalist lifestyle, this is a great example of using the least amount of energy for the biggest gain.
DIY air conditioner
In the NO GRID Survival Projects book, the authors describe a DIY air conditioner, which is a clever low-cost option for small spaces. It works by blowing air across ice inside a cooler, then pushing the cooled air out through ducts, which makes it most useful for a person, a sleeping area, or a small enclosed space rather than an entire room. The build is simple enough for off-grid use and can run on either 12-volt DC power or household electricity, which fits well with vanlife. If you don’t have a 12V setup in your tiny house, you can simply replace the fan with a 220V version.
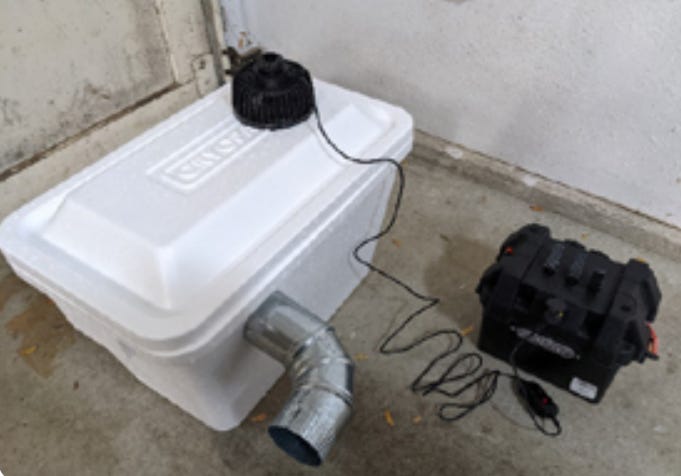
Its biggest advantage is efficiency at the point of use. It does not try to cool an entire space the way a full AC system does. It cools the air where you actually sit or sleep. That is very much a minimalist approach: targeted comfort, low complexity, low cost, and low power demand.
The limitations are just as important. It needs ice, which can be hard to produce or store in a grid-down situation. Creating ice is also very energy intense. The cooler loses insulation once you cut openings into it. It also does not scale well, so it is best seen as a temporary or localized cooling aid rather than a true replacement for a real AC unit.
Portable ACs
Portable air conditioners are the more familiar option, and they can work well in tiny houses if the venting is done properly. They are convenient because they are self-contained and can cool a small room or sleeping zone without needing a permanent install. The downside is that portable ACs are generally less efficient than split systems, especially single-hose designs, and they need a clear vent path to dump hot air outside.
For vanlife and small off-grid homes, portable ACs shine when you have shore power, a generator, or a strong battery setup. They are best when you need reliable cooling during extreme heat, not as a low-energy everyday solution. In a minimalist framework, they make sense when comfort and safety matter more than elegance or efficiency.
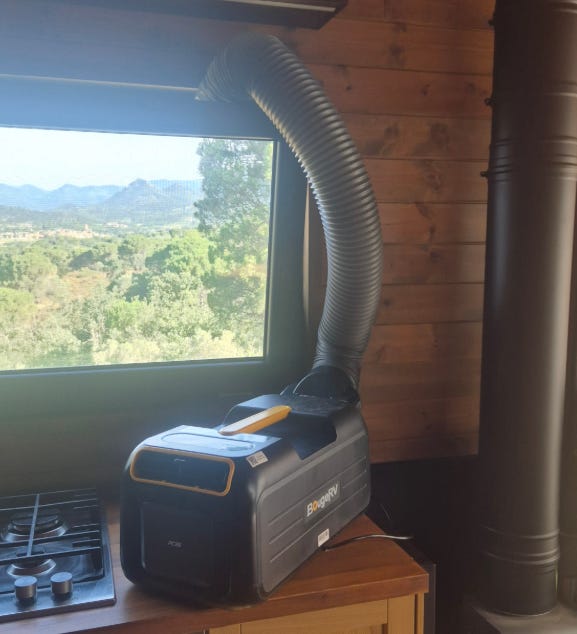
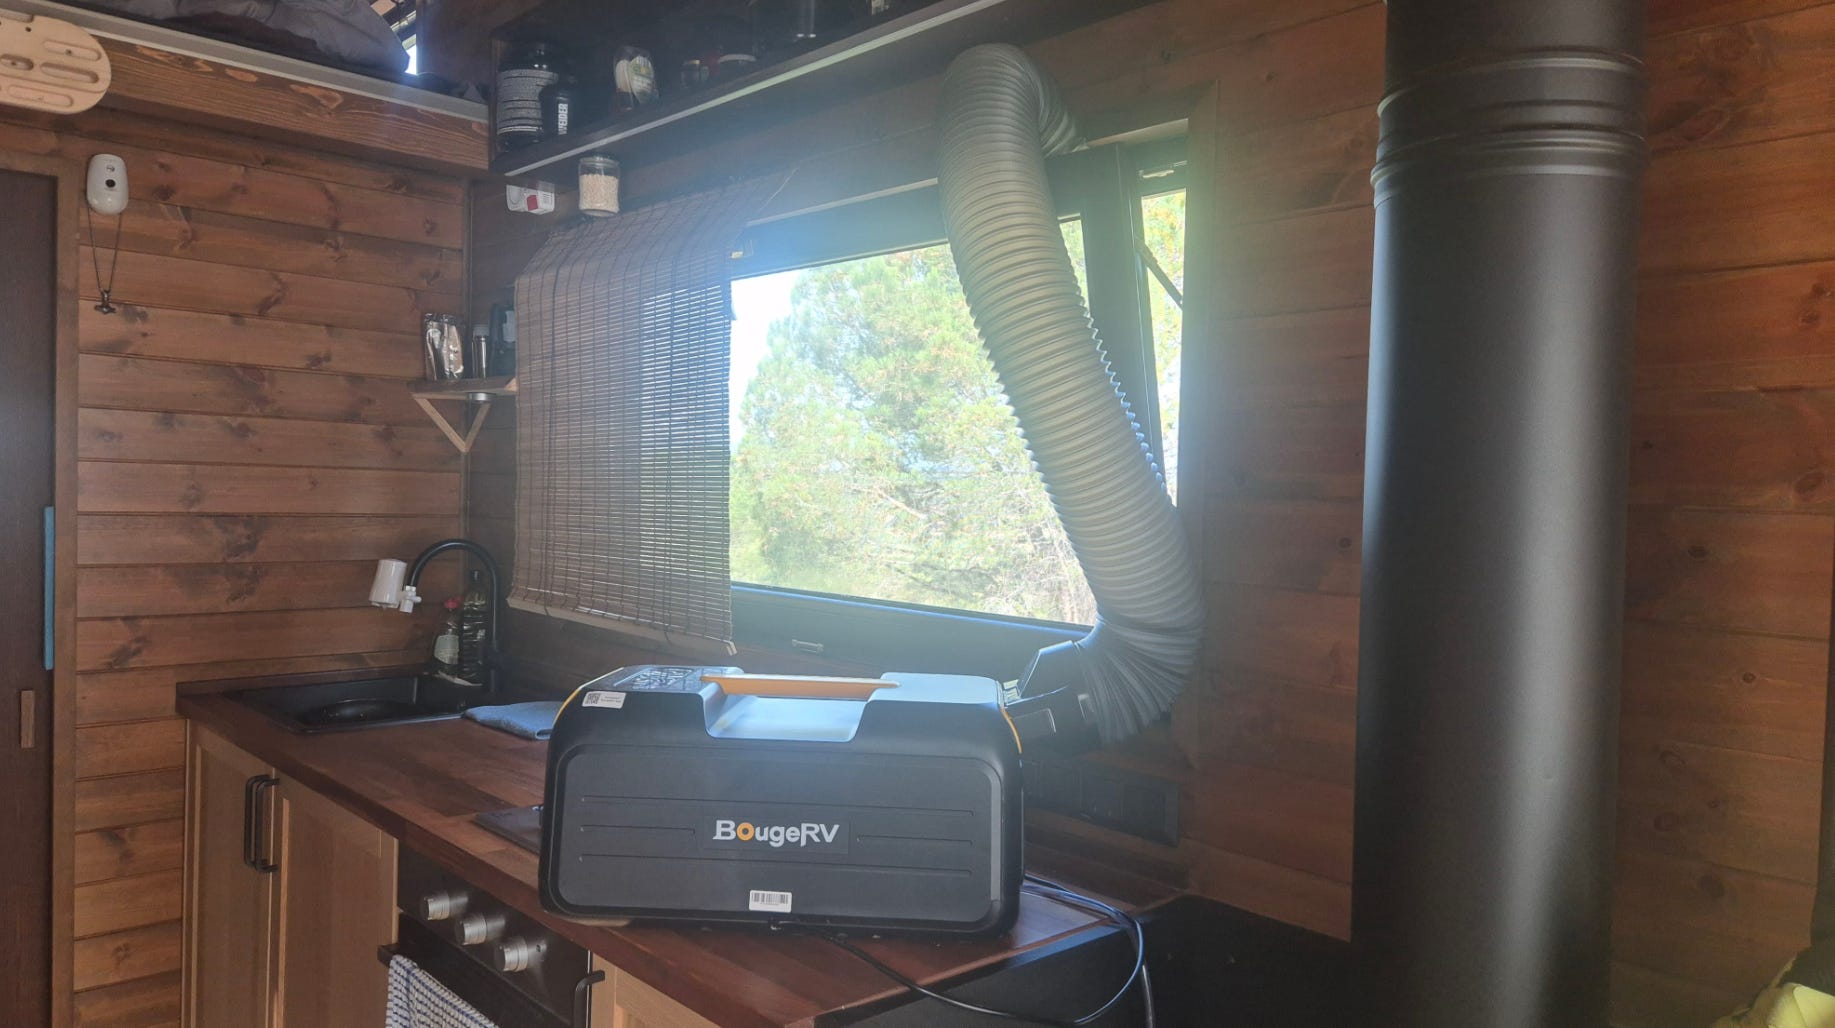
The photo shows my first experiment with this portable AC device. It is a good product with good value for money and an acceptable energy efficiency. A couple of things became very clear during my experiments: ideally the pipe the blasts out the hot air is fitted into a hole rather than the open window. Also the pipe gets very hot and more or less offsets the expelled cool air. So, I didn’t really gain anything except when sitting directly in front of it. The much better approach is to position the portable unit outside, drill a hole in the wall and lead the cold air via the pipe inside.
Lessons learned.
DIY AC vs portable AC
Here is the practical tradeoff. The DIY cooler-and-ice AC is cheaper, simpler, and often lower power, but it is limited by ice supply and short runtime. A portable AC is more expensive and more power-hungry, but it offers real refrigeration-based cooling and can keep working as long as you can power it.
If you live off-grid or move often, the DIY option can be a smart backup for short-term relief. If you stay parked in intense heat for long periods, a portable AC is usually more dependable. The best choice depends on whether your priority is emergency comfort, routine daily use, or battery conservation.
Pro-tip: I also always have a little portable mini USB fan with me. Better than nothing…
Extra heat-beating tips
A few small habits can make the space noticeably cooler. Cook outside when possible, avoid generating heat indoors in the afternoon, and open vents and windows only when outside air is actually cooler than the interior. Night cooling is also powerful: once the sun drops, flush hot air out aggressively and let the building or van cool overnight.
If your setup allows it, use reflective covers on windows and light-colored materials on exposed surfaces. Green shade from trees is ideal, but in many campsites or open van stops it is not available, so portable shade cloth and strategic parking become your next best tools. In a tiny home or van, small improvements stack up quickly.
I also adapt my rhythm a little. I try to shift brain work to the early morning when it’s still cooler or to night hours. During workouts or manual work outside I don’t mind the heat. Another pro-tip: if it’s really unbearably hot, I drive to the village and work from a cafe.
Minimalist summer living
The real lesson here is that staying cool in a tiny house or van is not about owning the biggest machine. It is about using the smartest system. Passive cooling, airflow, insulation, targeted backup cooling, adapting rhythm and habits all fit naturally into a minimalist, outdoor, and nature-connected lifestyle.
That is what makes this topic so relevant to The Rich Minimalist. Simple spaces ask for simple solutions, and summer comfort often comes from understanding the building, the weather, and your own habits rather than from buying more stuff. When you choose the right cooling strategy, you are not just beating the heat. You are living more deliberately.
If this kind of practical approach to tiny house living, minimalism, and self-sufficiency resonates with you, consider subscribing to The Rich Minimalist. It’s free.
Or just leave a comment or a ❤️